In This Topic
GdViewer integration in Visual C++ with MFC
In This Topic
Overview
This tutorial is aiming at creating simple MFC application using GdPicture.NET with Visual C++ (up to VS 2017), which will contain GdViewer ActiveX component. GdViewer will create dynamically, and a click on "button" triggers all functionality. For better understanding, we demonstrate the steps on the attached snapshots below.
You can find the simple example of usage in the folder [INSTALLATION FOLDER]\Samples\WinForm\c++ mfc using com interop .
IntelliSense is fully supported in Visual C++
Integration
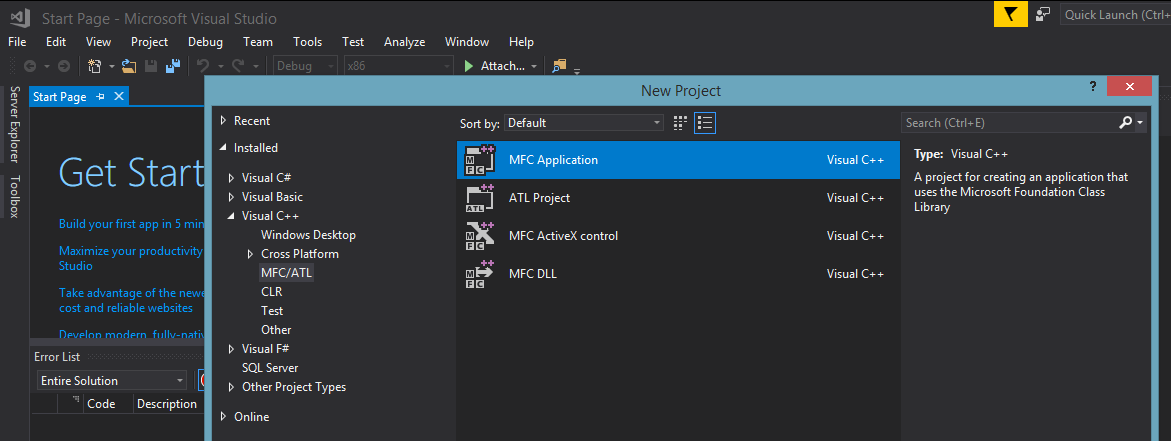
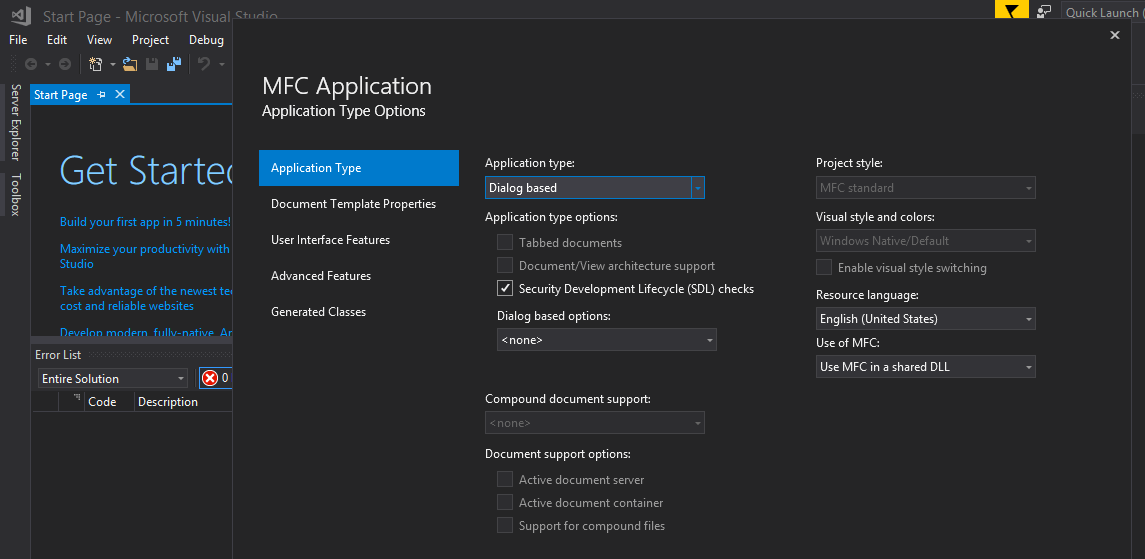
- Start a new project in Visual Studio ---> File -> New -> Project ---> and select Visual C++ -> MFC/ATL -> MFC application. Write the project name and confirm. As an application type select "Dialog based application" and finish creating the project. Copy (not required) GdPicture.NET.14.(64).dll and GdPicture.NET.14.tlb into your application folder.
- To import the installed GdPicture.NET toolkit (dll) and to integrate the GdViewer control you need to follow both these steps:
- Importing as ActiveX control:
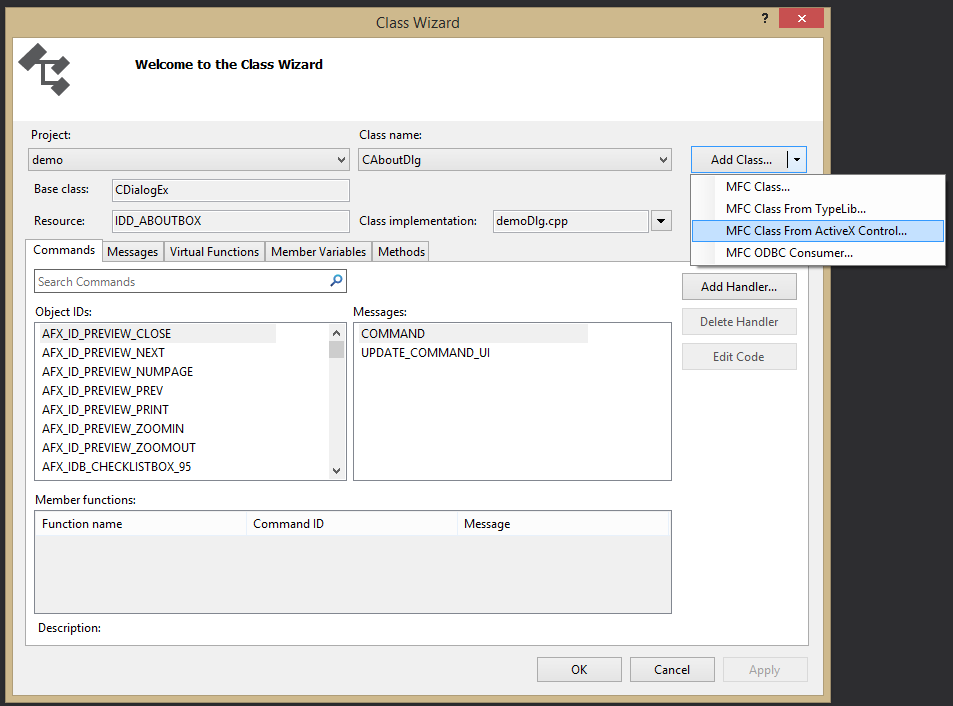
- Use Project/Class Wizard (available until VS 2017) and select the "Add Class" dropdown and then "MFC Class from ActiveX control" item. This is neccessary for controls like GdViewer.
- The window with the wizard appears. From the "Available ActiveX controls" list choose "GdPicture14.GdViewer".
- From the Interfaces list choose "IGdViewer" and add it on the "Generated classes" list.
- Click Finish button, then press OK to finish class wizard.
- Importing from TypeLib:
- Use Project/Class Wizard (available until VS 2017) and select the "Add Class" dropdown and then "MFC Class From TypeLib" item.
- The window with the wizard appears. From the "Available type libraries" list choose "GdPicture14 - Document Imaging".
- From the Interfaces list choose "ILicenseManager" and "__GdViewer". Add them on the "Generated classes" list.
- Click Finish button, then press OK to finish class wizard.
- Importing as ActiveX control:
- Initialize COM objects in your application by adding this code line:
- HRESULT hr = CoInitialize(NULL);
- Include generated headers into your files and build the application.
Start a new project.
Set your MFC application as Dialog based.
Copy GdPicture.NET.14.dll and GdPicture.NET.14.tlb to your application folder.
Import the dll as ActiveX by selecting MFC Class from ActiveX control, see the step 2.1.1.
From the Interfaces list choose "IGdViewer" and add it on the "Generated classes" list, see the step 2.1.2.

Select Add class from: File and navigate to select GdPicture.NET.14.tlb.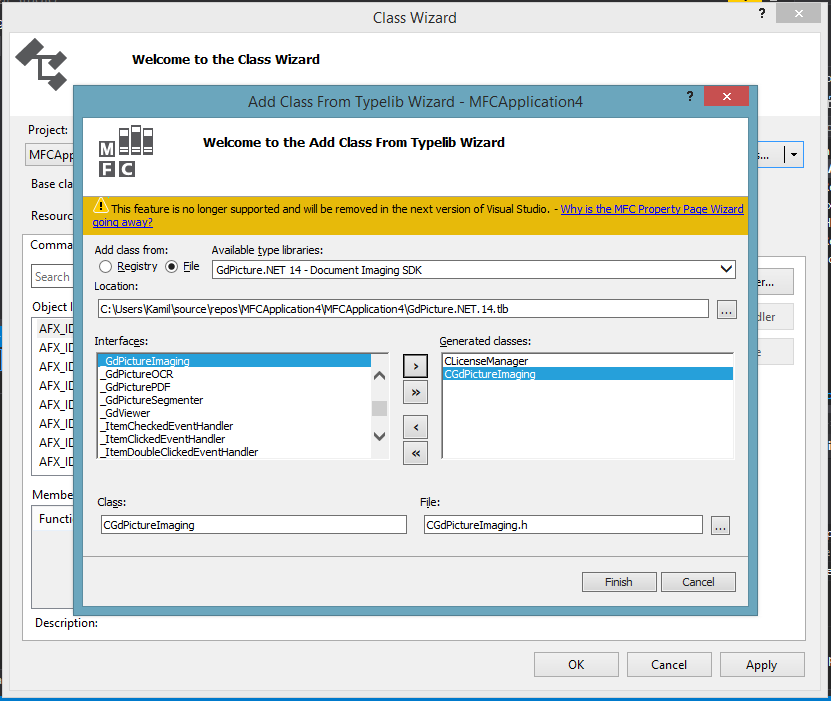
From the Interfaces list choose "ILicenseManager" and "__GdViewer", or another ones you will need. Add them on the "Generated classes" list.
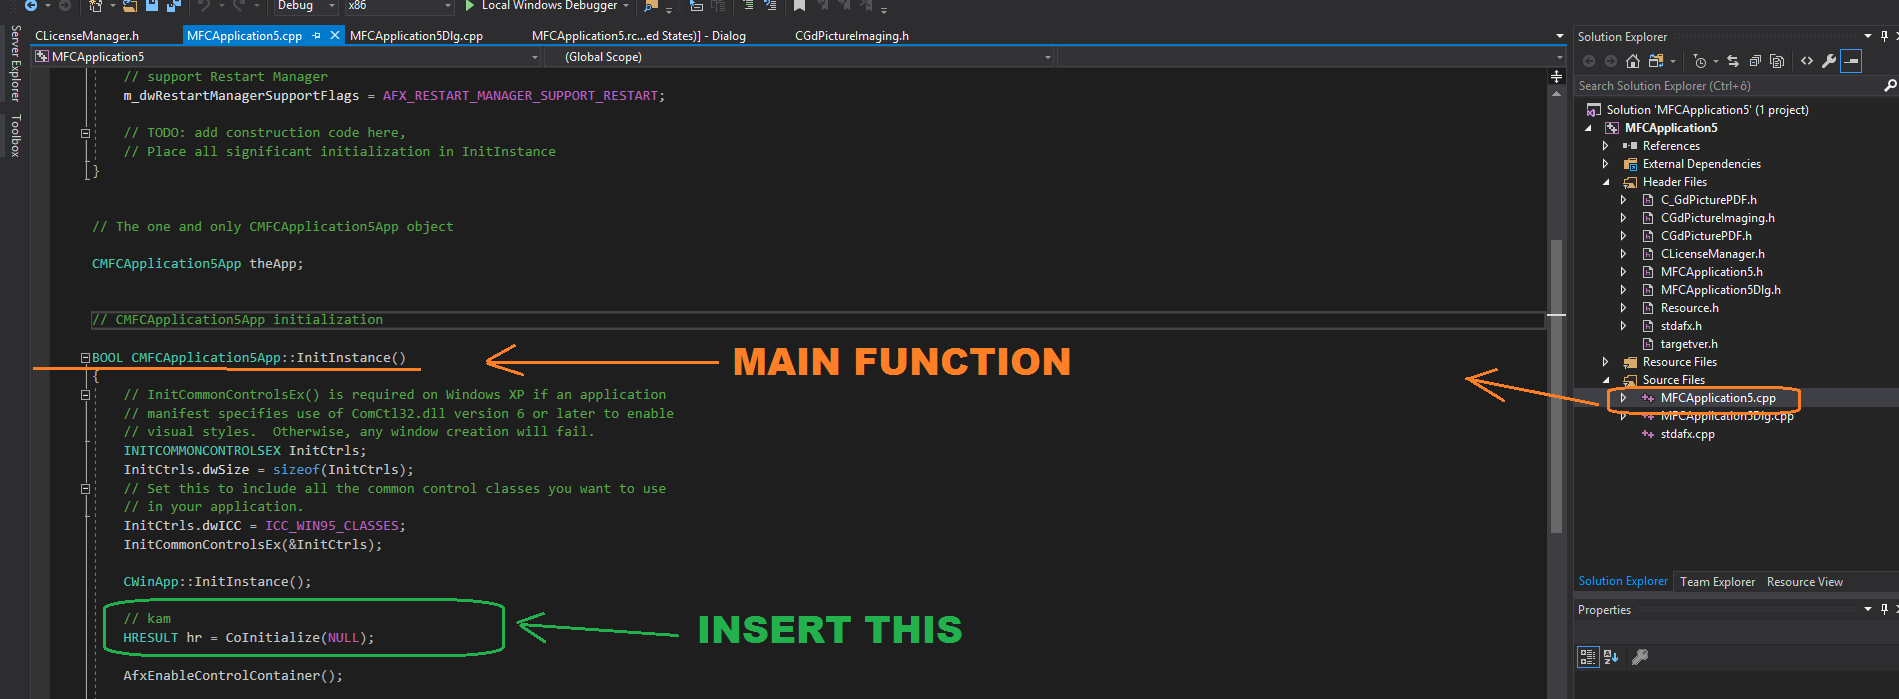
Initialize Com objects, for example, in your main cpp file like this:
| Adapting source codes |
Copy Code |
|---|---|
BOOL CdemoApp::InitInstance()

 {

   ...

   InitCtrls.dwICC = ICC_WIN95_CLASSES;

   InitCommonControlsEx(&InitCtrls);


   CWinApp::InitInstance();

   HRESULT hr = CoInitialize(NULL);

   ...

} | |
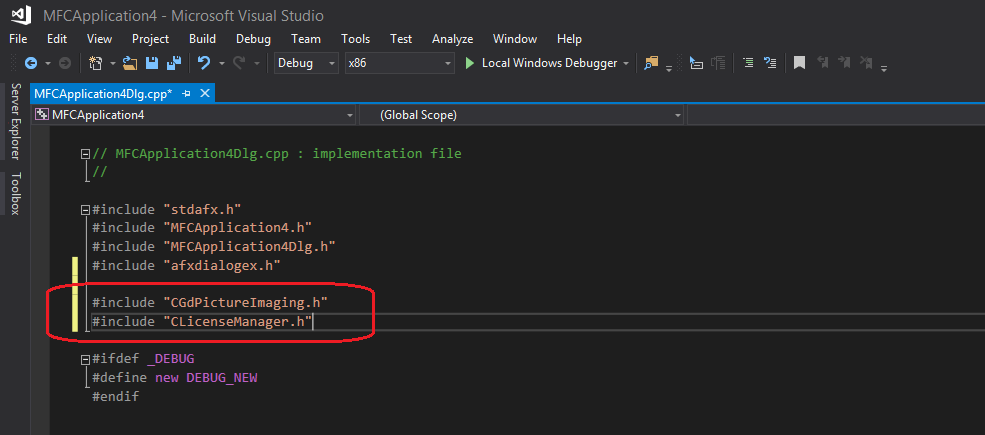
Include generated headers like this:
| Adapting source codes |
Copy Code |
|---|---|
// Add GdViewer control to the demoDlg.h file: class CdemoDlg : public CDialogEx { // Construction public: CGdViewer sampleView; ... } // Include headers in the demoDlg.cpp file: #include "C_GdViewer.h" #include "CLicenseManager.h" | |
GdViewer functionality
Add code to initialize the GdViewer component
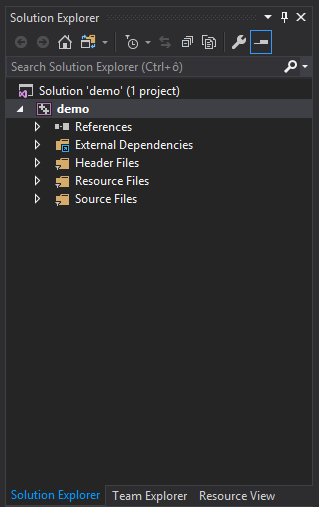
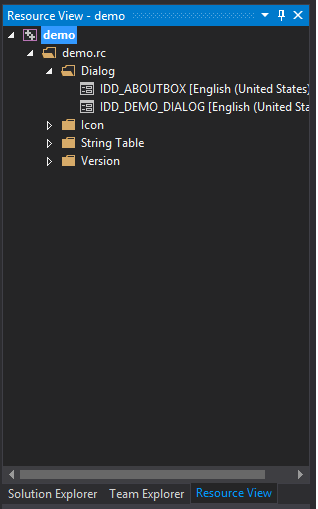
1. Your default solution will look like this (see the first screenshot). In resource view (right-top panel) click on Dialog/IDD_DEMO_DIALOG (see the second screenshot).
2. When formular appears, from the toolbox on the left side choose "Button" and place it on the formular.
4. Double click on the formular -> the method for the button click appears.
5. Update it with this code:
| Adding GdViewer |
Copy Code |
|---|---|
const int CTRL_ID = 280; void CdemoDlg::OnBnClickedButton1() { // TODO: Add your control notification handler code here CLicenseManager oLicenseManager; oLicenseManager.CreateDispatch(L"GdPicture14.LicenseManager"); oLicenseManager.RegisterKEY(L" XXX "); // Create the control, just make sure to use WS_CHILD and WS_VISIBLE. if (!sampleView.Create(L"PdfWnd", WS_CHILD | WS_VISIBLE, CRect(0, 0, 200, 200), this, CTRL_ID)) { AfxMessageBox(L"Failed to create GdViewer control"); return; } // Sample init settings, not neccessary sampleView.put_EnableMenu(false); sampleView.put_ContinuousViewMode(TRUE); sampleView.put_MouseWheelMode(2); sampleView.put_ScrollBars(TRUE); sampleView.DisplayFromFile(L"image.jpg"); sampleView.Redraw(); } | |
Add code to dispose of the GdViewer component
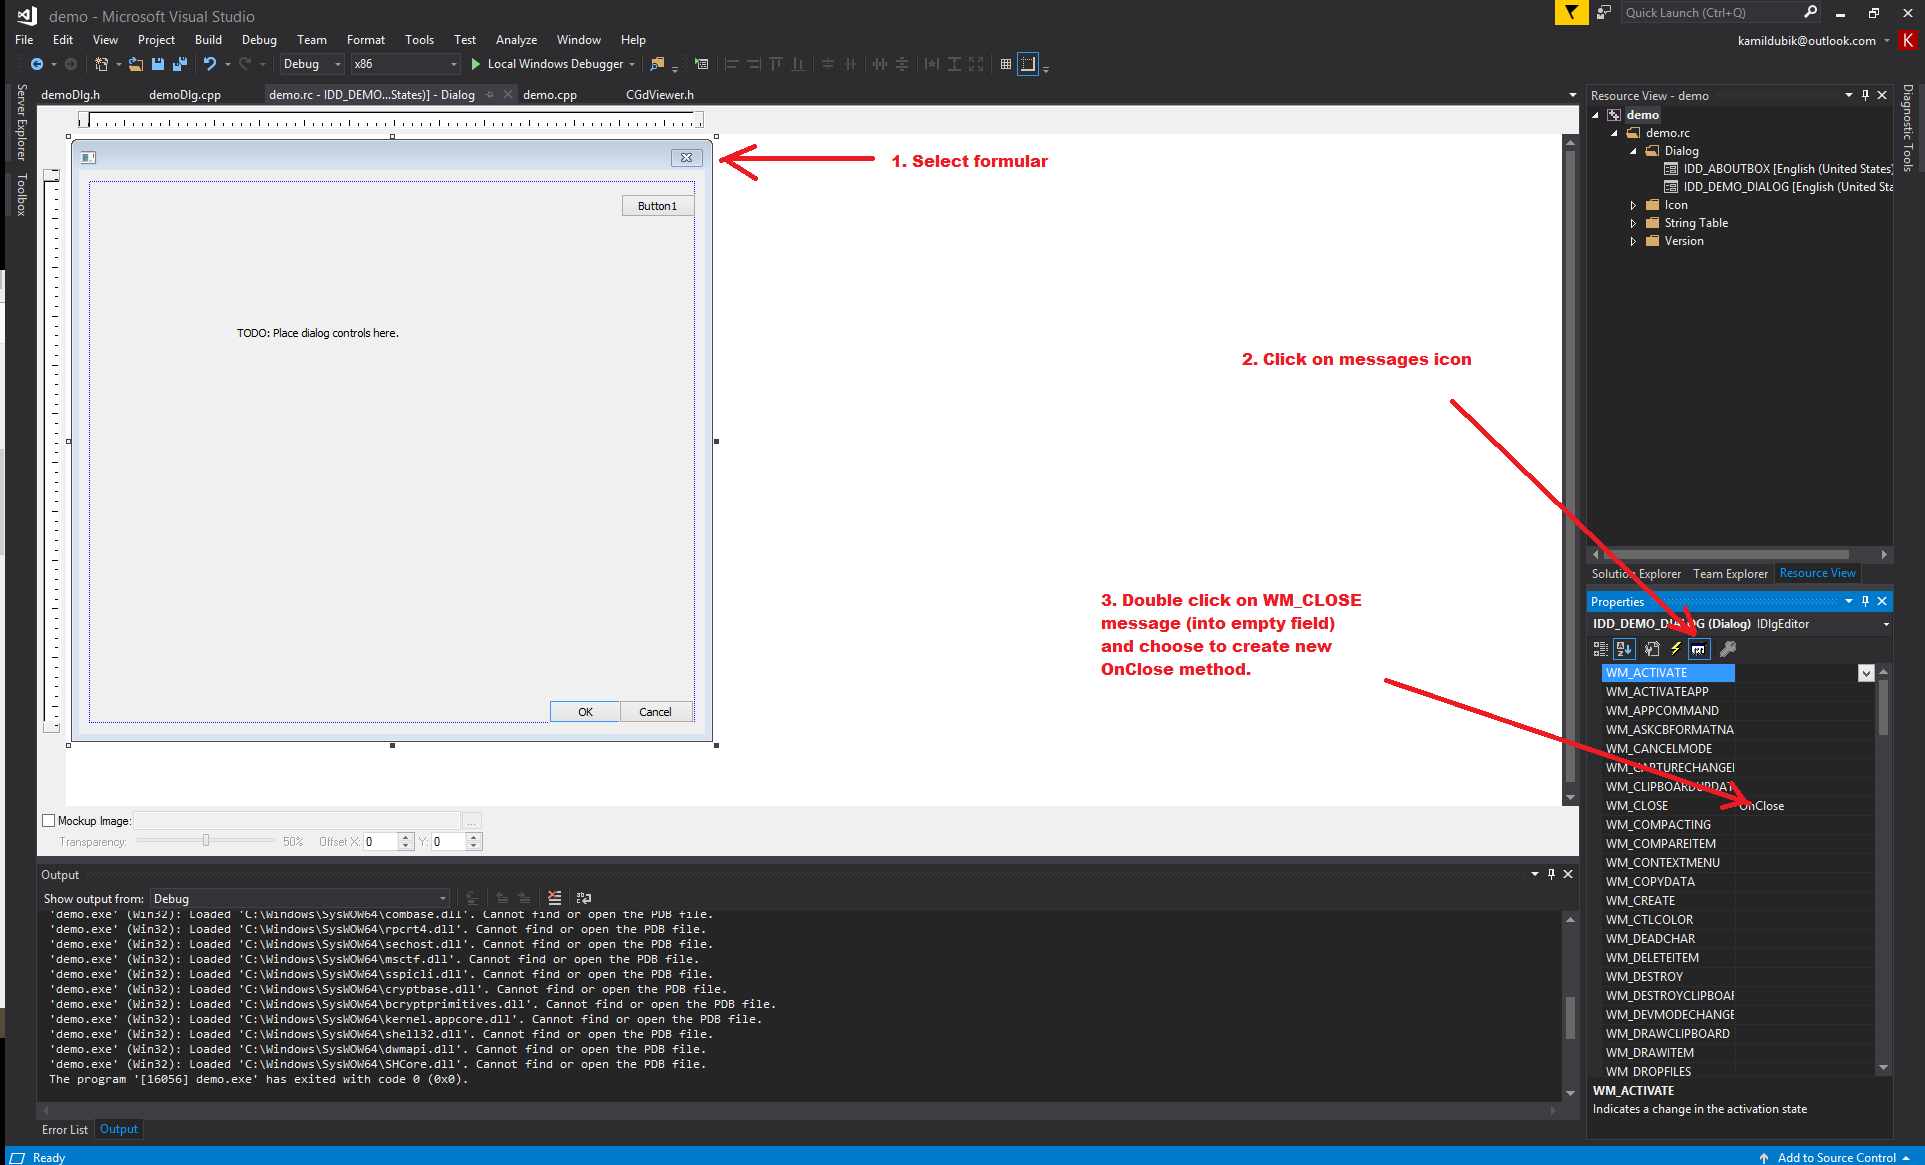
This is only an example of how you can release the GdViewer component. The important point here is that you need to dispose of the objects properly one way or another. 1. Add a new method for handling Close() message like this: click to resource view-> demo -> dialog -> IDD_DEMO_DIALOG
2. Formular with our dialog appears, click into formular (to select it).
4. Click on messages icon in properties bar.
5. Double click on field next to "WM_CLOSE" message. This will offer you option to create method for handling Close() message.
6. Add this code to method we just created:
- sampleView.CloseDocument();
- sampleView.Dispose();
| Handling Close() message |
Copy Code |
|---|---|
// The result will look like this: void CdemoDlg::OnClose() { // TODO: Add your message handler code here and/or call default CDialogEx::OnClose(); sampleView.CloseDocument(); sampleView.Dispose(); } | |
See Also